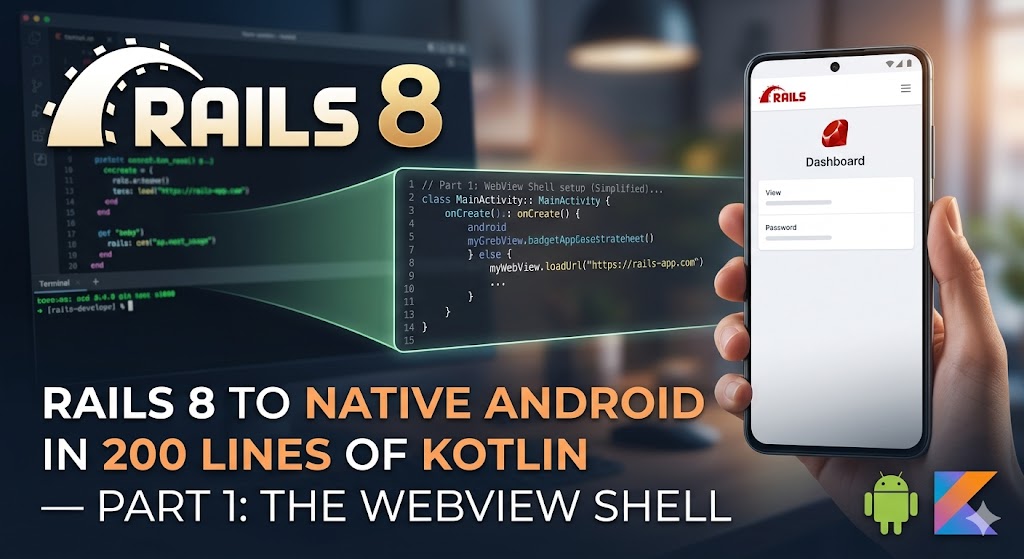
Series:* 3-part tutorial on turning any Rails 8 app into a native Android app using Hotwire Native patterns — no React Native, no Flutter, no rewrite.
Your Rails app is already mobile-responsive. What if it felt like a real app on someone's phone?
We took a full-featured school management portal — serving 2,500+ students and 150+ staff across admin, teacher, student, and parent portals — and wrapped it in a native Android shell. Bottom tab navigation, branded splash screen, persistent sessions. The entire Android app is under 200 lines of Kotlin.
Who This Is For
- Rails developers who want to ship a mobile app without learning React Native
- Teams that already have a mobile-responsive web app
- Businesses that need an internal app distributed outside the Play Store
- Anyone who thinks "we need a mobile app" but doesn't have mobile developers
Why Not PWA?
Progressive Web Apps work, but on Android they have real limitations:
- Inconsistent home screen icons — some devices show generic browser icons
- No bottom tab navigation — PWAs get the browser's navigation, not custom tabs
- Limited push notification reliability — browsers throttle web push on Android
- No camera/mic access in embedded iframes — critical if you use video calling
- No auto-update mechanism — users don't know when features ship
- No splash screen control — the PWA splash is basic and uncustomisable
A native WebView wrapper solves all of these. And because your entire UI stays in Rails, there's nothing to rewrite.
The Architecture
┌─────────────────────────────────────────┐
│  Android App (Kotlin)                   │
│                                         │
│  ┌───────────────────────────────────┐  │
│  │  MainActivity                     │  │
│  │  - Bottom Navigation (5 tabs)     │  │
│  │  - Fragment management            │  │
│  │  - Deep link handling             │  │
│  └───────────────────────────────────┘  │
│                                         │
│  ┌───────────────────────────────────┐  │
│  │  WebViewFragment (per tab)        │  │
│  │  - WebView with JS enabled        │  │
│  │  - Cookie persistence             │  │
│  │  - Custom user agent              │  │
│  │  - External URL handling          │  │
│  └───────────────────────────────────┘  │
│                                         │
│         ▼ WebView loads ▼               │
│  ┌───────────────────────────────────┐  │
│  │  https://yourapp.com              │  │
│  │  (Your Rails app — unchanged)     │  │
│  └───────────────────────────────────┘  │
└─────────────────────────────────────────┘
The Rails app doesn't know (or care) that it's running inside an Android WebView. It serves the same responsive HTML it serves to any mobile browser. The native shell provides the chrome around it.
Step 1: Project Setup
Create a new Android project in Android Studio:
- Language: Kotlin
- Minimum SDK: API 24 (Android 7.0 — covers 95%+ of devices)
- Template: Empty Activity
- Package: com.yourcompany.yourapp
Dependencies — you only need AndroidX and WebKit. No Turbo Native library needed (we're going lightweight):
dependencies {
    implementation 'androidx.core:core-ktx:1.12.0'
    implementation 'androidx.appcompat:appcompat:1.6.1'
    implementation 'com.google.android.material:material:1.11.0'
    implementation 'androidx.swiperefreshlayout:swiperefreshlayout:1.1.0'
}
Step 2: The Layout
Two layouts — the main activity with a fragment container and bottom navigation, and the web fragment with a WebView:
activity_main.xml:
```xml
<?xml version="1.0" encoding="utf-8"?>
android:layout_width="match_parent"
android:layout_height="match_parent"
android:orientation="vertical">
<FrameLayout
    android:id="@+id/fragment_container"
    android:layout_width="match_parent"
    android:layout_height="0dp"
    android:layout_weight="1" />

<com.google.android.material.bottomnavigation.BottomNavigationView
    android:id="@+id/bottom_navigation"
    android:layout_width="match_parent"
    android:layout_height="wrap_content"
    app:menu="@menu/bottom_nav" />
```
fragment_web.xml:
```xml
<?xml version="1.0" encoding="utf-8"?>
android:layout_height="match_parent">
<WebView
    android:id="@+id/turbo_web_view"
    android:layout_width="match_parent"
    android:layout_height="match_parent" />

<!-- Loading overlay shown on first launch -->
<View
    android:id="@+id/loading_overlay"
    android:layout_width="match_parent"
    android:layout_height="match_parent"
    android:background="@color/forest_green" />
```
Step 3: The WebViewFragment
This is the core of the app — a Fragment that hosts a configured WebView:
class WebViewFragment : Fragment() {

    private var webView: WebView? = null
    private var currentUrl: String = ""

    @SuppressLint("SetJavaScriptEnabled")
    override fun onViewCreated(view: View, savedInstanceState: Bundle?) {
        super.onViewCreated(view, savedInstanceState)

        webView = view.findViewById(R.id.turbo_web_view)
        currentUrl = arguments?.getString(ARG_URL) ?: "${BuildConfig.BASE_URL}/"

        webView?.apply {
            settings.javaScriptEnabled = true
            settings.domStorageEnabled = true
            settings.mediaPlaybackRequiresUserGesture = false
            settings.userAgentString =
                "${settings.userAgentString} MyApp Android/1.0 Turbo Native"

            // Cookie persistence — critical for Devise sessions
            CookieManager.getInstance().apply {
                setAcceptCookie(true)
                setAcceptThirdPartyCookies(this@apply, true)
            }

            webViewClient = object : WebViewClient() {
                override fun shouldOverrideUrlLoading(
                    view: WebView?, request: WebResourceRequest?
                ): Boolean {
                    val url = request?.url?.toString() ?: return false
                    // External URLs open in system browser
                    if (!url.contains("yourapp.com")) {
                        startActivity(Intent(Intent.ACTION_VIEW, Uri.parse(url)))
                        return true
                    }
                    return false
                }

                override fun onPageFinished(view: WebView?, url: String?) {
                    super.onPageFinished(view, url)
                    CookieManager.getInstance().flush()
                }
            }

            webChromeClient = WebChromeClient()
        }

        webView?.loadUrl(currentUrl)
    }

    fun reload() { webView?.reload() }
    fun canGoBack(): Boolean = webView?.canGoBack() ?: false
    fun goBack() { webView?.goBack() }
}
Critical settings explained:
- javaScriptEnabled = true — your Rails app needs JS (Turbo, Stimulus, ActionCable)
- domStorageEnabled = true — localStorage for Turbo cache, session tokens
- mediaPlaybackRequiresUserGesture = false — allows video/audio to play without tap (needed for video calls)
- Custom user agent — lets your Rails app detect the native shell
- Cookie flush on page finish — ensures Devise sessions persist across app restarts
Step 4: Bottom Tab Navigation with Fragment Caching
The MainActivity manages tabs. Each tab creates a WebViewFragment pointed at a URL, then caches it:
class MainActivity : AppCompatActivity() {

    private val tabs = mapOf(
        R.id.nav_home to "/",
        R.id.nav_portal to "/dashboard",
        R.id.nav_notifications to "/notifications",
        R.id.nav_profile to "/profile"
    )

    private var currentTabId = R.id.nav_home
    private var activeFragment: Fragment? = null

    private fun loadTab(tabId: Int) {
        val tag = "tab_$tabId"
        val transaction = supportFragmentManager.beginTransaction()

        // Hide current fragment (don't destroy — preserves state)
        activeFragment?.let { transaction.hide(it) }

        // Find or create the target fragment
        var fragment = supportFragmentManager.findFragmentByTag(tag)
        if (fragment == null) {
            val url = "${BuildConfig.BASE_URL}${tabs[tabId]}"
            fragment = WebViewFragment.newInstance(url)
            transaction.add(R.id.fragment_container, fragment, tag)
        } else {
            transaction.show(fragment)
        }

        transaction.commit()
        activeFragment = fragment
        currentTabId = tabId
    }
}
Why hide/show instead of replace? When you replace a fragment, the old one is destroyed and recreated when you switch back. That means the WebView reloads the page — losing scroll position, form state, and requiring a fresh HTTP request. Hide/show keeps all fragments alive in memory, giving instant tab switching.
Step 5: Server-Side Detection
On the Rails side, detect the native app and adjust the UI:
# app/helpers/application_helper.rb
def hotwire_native_app?
  request.user_agent&.include?("Turbo Native")
end
In your layouts:
<% unless hotwire_native_app? %>
  <!-- Hide web navigation — native app has bottom tabs -->
  <nav class="main-nav">...</nav>
<% end %>

<main class="<%= hotwire_native_app? ? 'pb-16' : '' %>">
  <%= yield %>
</main>

<% unless hotwire_native_app? %>
  <footer>...</footer>
<% end %>
The same Rails views serve both web and native — no duplication. The native app gets a cleaner view without redundant navigation, and bottom padding accounts for the tab bar.
Step 6: The Splash Screen
Android shows a blank screen while the WebView loads. Add a loading overlay that fades out on first page load:
override fun onPageFinished(view: WebView?, url: String?) {
    super.onPageFinished(view, url)

    loadingOverlay?.let { overlay ->
        if (overlay.visibility == View.VISIBLE) {
            overlay.animate()
                .alpha(0f)
                .setDuration(400)
                .withEndAction { overlay.visibility = View.GONE }
                .start()
        }
    }
}
Set the overlay to your brand colour (@color/forest_green) — users see a solid branded screen for 1-2 seconds, then it fades into the web app. Feels native.
Step 7: Build Configuration
In build.gradle, set your base URL as a build config field:
android {
    defaultConfig {
        buildConfigField "String", "BASE_URL", "\"https://yourapp.com\""
    }
}
This lets you use BuildConfig.BASE_URL throughout the Kotlin code. For development, create a debug variant pointing to your local server.
What You Have So Far
At this point your app:
- Opens in a native Android shell with your app icon
- Shows bottom tab navigation (Home, Portal, Notifications, Profile)
- Preserves login sessions across app restarts
- Opens external URLs in the system browser
- Shows a branded splash while loading
- Hides web navigation when detected as native
What's missing: Auto-updates, video call permissions, and the scroll conflict fix. We'll handle those in Parts 2 and 3.
Next: Part 2 — Auto-Updates Without the Play Store
We'll build an update checker that calls your Rails API, shows update prompts (with force-update support), and distributes APKs directly from your server.
Need help wrapping your Rails app? Get in touch — I've shipped this pattern to production.
Leave a comment